My little spot in the craft blogging world!

August 8, 2011

Rolled DSP Birthday Card

I hope everyone had a good weekend. I'm trying to enjoy my last couple of weeks of summer break before school starts, but have so much to do to get my classroom ready! Today the card I made was inspired by a Stamping magazine. I saw this idea on a scrapbook page and decided to make it into a card. I used Early Expresso for my card base and layered a piece of Confetti White on it. I used the Just Add Cake DSP for the rolled pieces at the bottom. A great way to add depth and interest to any card as well as show off the colorful DSP! I wrapped a piece of Early Expresso baker's twine around the pieces of designer paper. I used the cute elephant image from the single stamp Elebration. This set can be used for boys, girls, birthdays, baby showers, etc. Just omit the cake if it's not a birthday card you're making. I stamped him on watercolor paper and cut him out. He is colored with watercolor crayons and a blender pen. I paper pieced the ballon and cake and added some Dazzling Details (available in the new Holiday Mini on Sept. 1st) to both. I used the Scallop square duo bigz die and cut out a piece of Wild Wasabi to layer under the elephant. I used my paper piercing tool and poked holes around the edges of the scallops. The elephant is popped up on dimensionals. I'm happy with how this card turned out!


Thanks for stopping by!

Contact me to order any of the Stampin' Up! supplies you see used here or you would like to become a Stampin' Up! demomstrator.

Stamps: Elebration
Ink: Black Stazon
Paper: Early Expresso, Confetti White, Wild Wasabi, Watercolor paper, Just Add Cake DSP, Blushing Bride, So Saffon
Accessories: Early Expresso Baker's Twine, Scallop Square Duo Bigz Die, Big Shot, Watercolor Crayons, blender pen, dimensionals, paper piercing tool, Dazzling Details

August 5, 2011

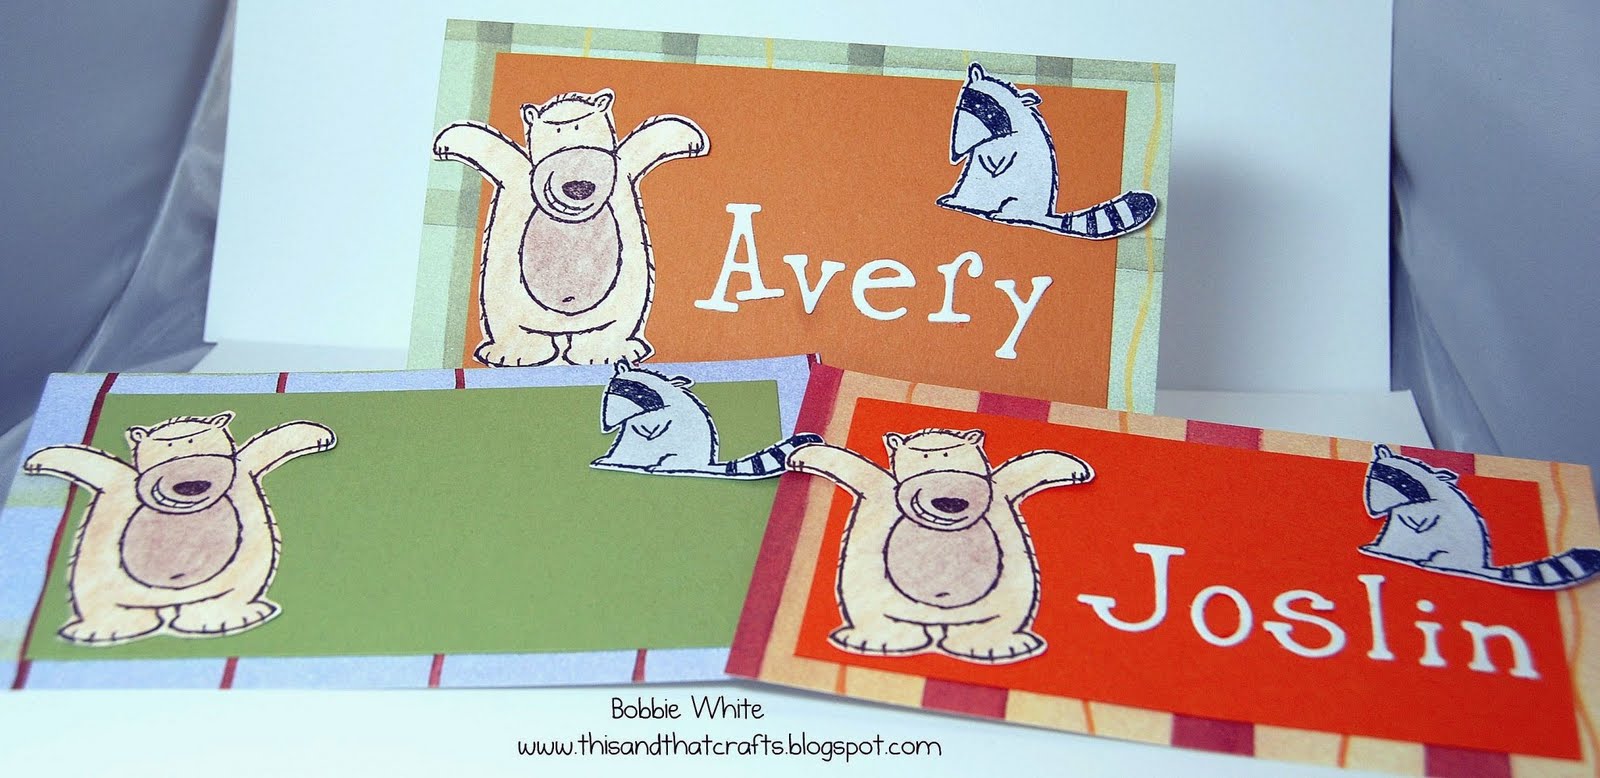
Classroom Cubby Name Tags

Here are the cubby name tags I'm making for the kiddos in my class this year. I'm doing a camping theme in my room, so I pulled out the Stampin' Up! set Under The Stars. I really like this set - so cute! I don't have my final class list yet, so I only put names on 2 of the name tags. Only 18 more to go! I colored the bear and raccoon in with Stampin' pastels and cut them out. The names I'm using the sizzix die Wingo Zingo with SU! Confetti White cardstock. Sorry about the pictures. The colors didn't turn out very well. They are supposed to be More Mustard, Pumpkin Pie, and Pear Pizzazz. Not sure why they seem so bright. When I get them all completed I will be laminating them so they last the entire school year.


Thanks for stopping by!

Contact me to order any of the Stampin' Up! supplies you see used here or to become a demonstrator! My contact info is on the left sidebar.

Stamps: Under the Stars
Ink: Early Expresso, Basic Black
Paper: More Mustard, Pumpkin Pie, Pear Pizzazz, unknown patterned paper, Very Vanilla, Confetti White
Accessories: Stampin' Pastels, sponge dauber, Big Shot, Sizzix die Wingo Zingo

Retired Stamps For Sale

I've been cleaning out my crafting area and found some stamps that I hardly ever use or that I've never used. If you see a set you would like, email me and I will get back with you. The price and condition of the stamps are listed. CM=Clear Mount. Prices don't include shipping. I accept paypal.  I'll be back later today with a project I'm working on for my classroom, cubby name tags!
                     
          Retired Sets For Sale:
The More the Merrier $15.00
Year Round Fun II $10
Framed With Love $10 (New, mounted)
Party Hearty $12 (staining on a couple stamps)
If the Halo Fits $12 (mounted, but new)
Polka Dot Punches $8
Send a Celebration $6
It's a Loop Thing $4
Bitty Birthday $5 (NUM)
Punch Potpourri CM $12 (NUM)
Thankful For CM $10 (NUM)
Picnic Parade CM $13 (only 1 or 2 stamps used, the rest are UM)
Love Bug $8 (NUM)
Zoofari $10(a few stains on wood)
All God's Children $10
Well Worn Numbers $10
Happiness Is...Stampin' Up! $6
Yukon $30 (EUC)

                                            Thanks for stopping by!
                                                  

August 4, 2011

In Color Birthday Card

This card shows off all the wonderful new In Colors as well as several of the Stampin' Up! textured impressions embossing folders. I started with a Crumb Cake card base. I then took a piece of cardstock in each of the In Colors and ran each one through a different embossing folder. I layered them on the card base and stamped the Happy Birthday from the new hostess set Happiest Birthday Wishes on Daffodil Delight. I punched it out with the 1 3/4" scallop circle punch and popped it up on some dimensionals. I wrapped a piece of twill tape around the card to help set off the sentiment. I got the idea for this card from the birthday bag tag on page 218 of the Idea Book & Catalog. I just made the tag into a card! I really like how bright and cheery this card is. Now, who gets it?
Thanks for stopping by!

Contact me if you would like to order any of the Stampin' Up! supplies you see used here. My contact info is on the left sidebar.

Stamps: Happiest Birthday Wishes
Ink: Basic Black
Paper: Crumb Cake, Pool Party, Wisteria Wonder, Island Indigo, Lucky Limeade, Calypso Coral, Daffodil Delight
Accessories: 1 3/4" Scallop circle punch, twill tape, dimensionals, Stripes, Houndstooth, Square Lattice, and Perfect Polka Dots Textured Impressions Embossing Folders, Perfect Details Texturz Plates

August 3, 2011

Kite Birthday Card

Here is a card I made for my mom's birthday later this month. I got the idea for this card from a Cards magazine. I just changed it to all SU! products. I also changed the layout a bit. I enjoy finding inspiration from the many card idea magazines out there and recreating the cards with SU! goodies. I used the new hostess DSP Cheerful Treat for the background. Love this paper!! For the kite, I just hand drew it and cut it out. I tried using punches, but it never turned out just right. The sentiment is from the set A Word For You and cut out with the Lots of Tags sizzlits die. I stitched around the edges of all the the DSP to add a little detail.
Thanks for stopping by!

Contact me if you would like to order any of the Stampin' Up! supplies I've used.

Stamps: A Word For You
Paper: Whisper White, Certainly Celery, Cheerful Treat DSP, Subtles DSP
Ink: Basic Black
Accessories: Scallop edge border punch, Lots of Tags Sizzlit die, Baker's twine, heat & stick powder, Fine Supernova glitter, paper piercing tool, sewing machine & thread (non SU!)

August 2, 2011

Altered Clock for My Classroom

Here is a clock I altered to put in my classroom. I bought a cheap clock, took the front plastic off, and cut a piece of Whisper White cardstock to fit the face. I then stamped several kids from the All In The Family set and colored them in with Stampin' Pastels. It took a little time to stamp and color all the kiddos, but worth it. Once all the kids were stamped, I took my color spritzer tool and spritzed some Old Olive and Real Red on the face and around the kids. I cut a piece of Celebrations DSP (retired) to give it a little more color in the middle. I then sponged some Old Olive craft ink around the outside edge of the clock. I did this because just plain white looked, well, plain. I'm pretty happy with the turnout. On my last little girl I stamped, my hand jiggled so it looks like she has a double chin. It's not perfect, but since it's just for me, I'll live with it because I'm sure not redoing this! I'm not worried about not having numbers on my clock. I teach PreK and the kiddos in my class aren't quite to time telling yet. Now I can say "when the big hand gets to the girl in purple...".

                                                                Thank for stopping by!

                 Email me if you would like to order any of the Stampin' Up! products you see used here!

Stamps: All In The Family
Ink: Old Olive craft, black stazon
Paper: Whisper White, Celebrations DSP (retired)
Accessories: Stampin' Pastels, blender pen, color spritzer tool, Old Olive & Real Red markers, sponge

August 1, 2011

Glass Magnets

Here are some glass magnets I made with the Every Little Bit stamp set from SU!. I thought these would be good to give to a teacher. I know I always need magnets to hang things up on my whiteboard in my classroom! I stamped the image on Whisper White cardstock then colored them in using blender pens and ink pads. Once they were all colored, I punched them out using the 1 1/4" circle punch - perfect size! I adhered the cardstock to the glass with Crystal Effects. Once dry, I sanded the edges and applied another coat of Crystal Effects, making sure I sealed the edges good. When that dried I attached the magnet with E6000 glue. Stinky stuff, but it works! These will be for sale in my Artfire store once it's up and going. Until then, email me if you are interested in purchasing them. I accept paypal.


Thanks for stopping by!

If you would like to order Stampin' Up!, email me!

Stamps: Every Little Bit
Ink: Various SU!
Paper: Whisper White
Accessories: 1 1/4" circle punch, blender pen, crystal effects, magnets (non SU!), E6000 glue (non SU!)